


We’re working through the first book, Little House in the Big Woods, and all the girls agreed that they would love to make a corncob doll like the one Laura describes. However, if you’ve read the headline of this post, you already know that this post is about making “corn husk” dolls — not “corncob” dolls.
Funny thing about planning projects: You should really take into consideration if your project is seasonal before choosing it. The first half of Little House in the Big Woods is all about preparing for winter, thus a dried corncob would be readily available. Not so in the middle of February! After discovering that most stores weren’t even carrying corn on the cob, or if they did, it was shrink-wrapped sans husks for more than $4 a package, I made the “executive” decision to use the dried corn husks we’d already purchased for doll hair and make corn husk dolls instead.
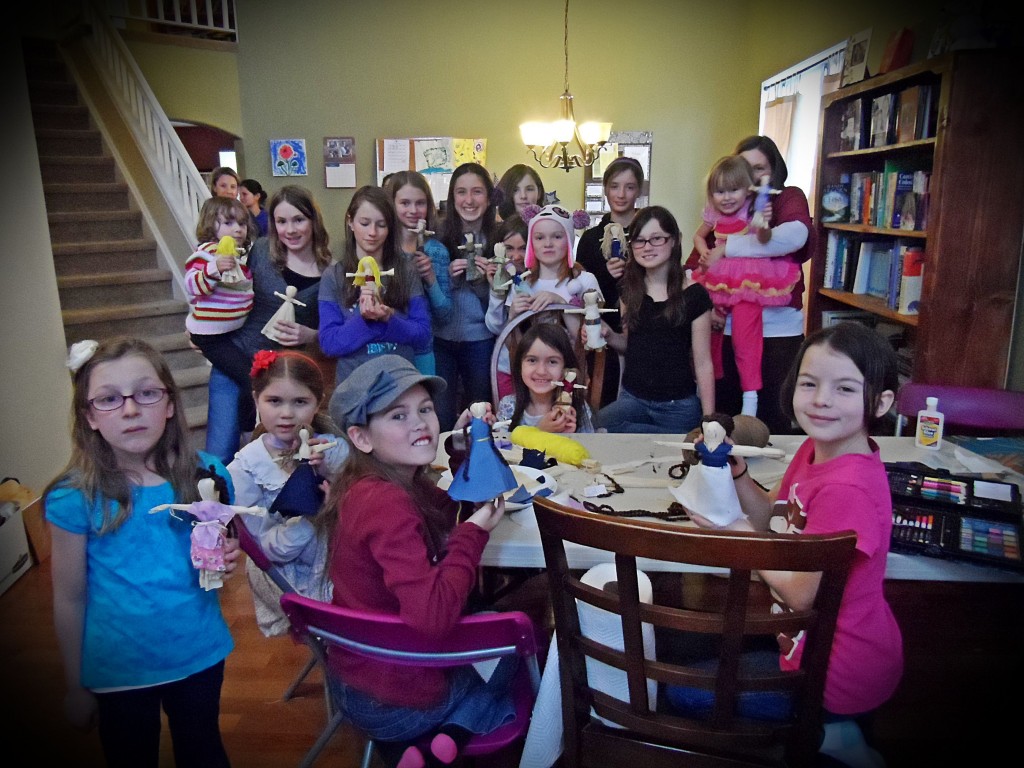
 A corn husk doll is actually a Native American toy (see Wikipedia for a brief history) that was adopted by early American settlers. And even though it’s not the corncob doll Laura describes, the girls really had a blast making them! They were very creative with their clothing and hair designs once the more intricate steps in creating the body were accomplished. I also loved the fact that girls of all ages — as young as three and as old as 13 — were completely captivated by this project, as well as the moms working alongside their girls.
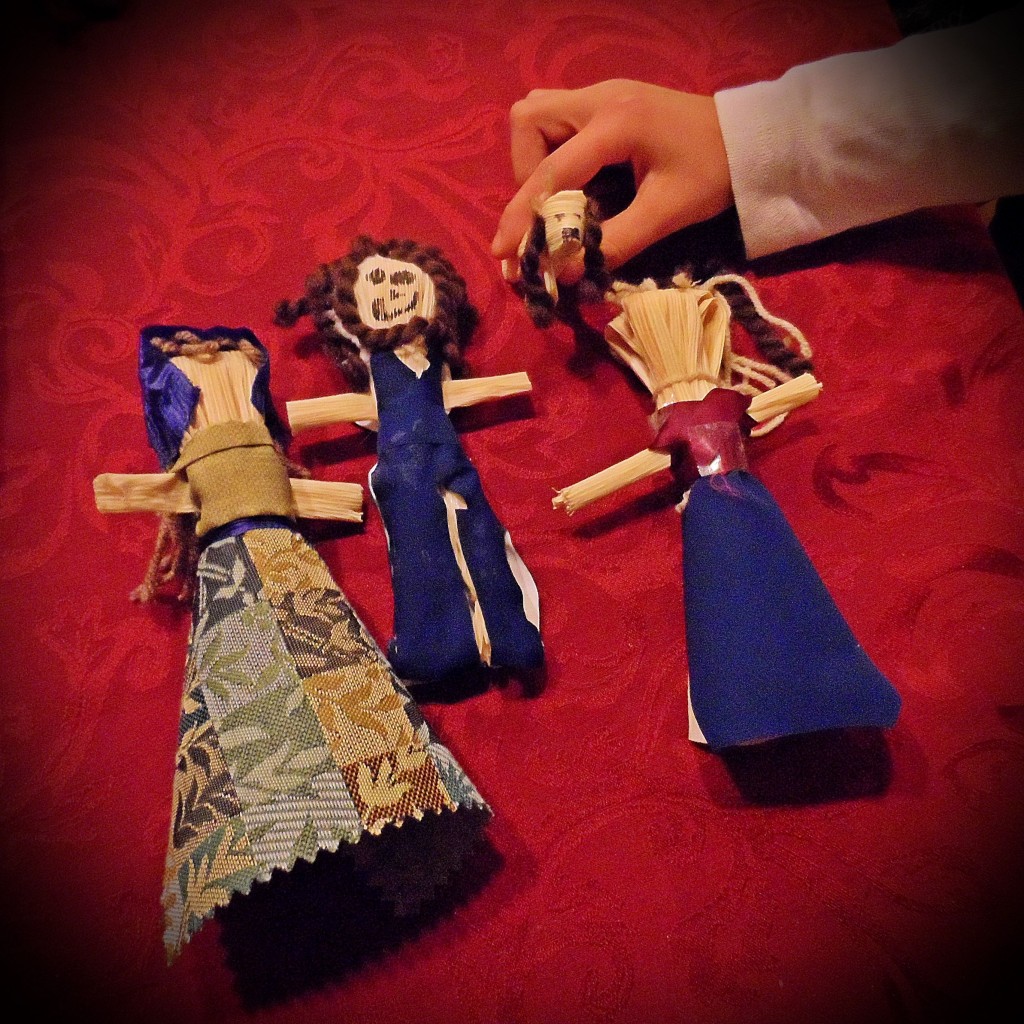
In fact, after book club disbanded two hours later, my three girls (5, 10 and 12) proceeded to make an entirely new corn husk family, complete with the family dog!
Making corn husk dolls, step by step:
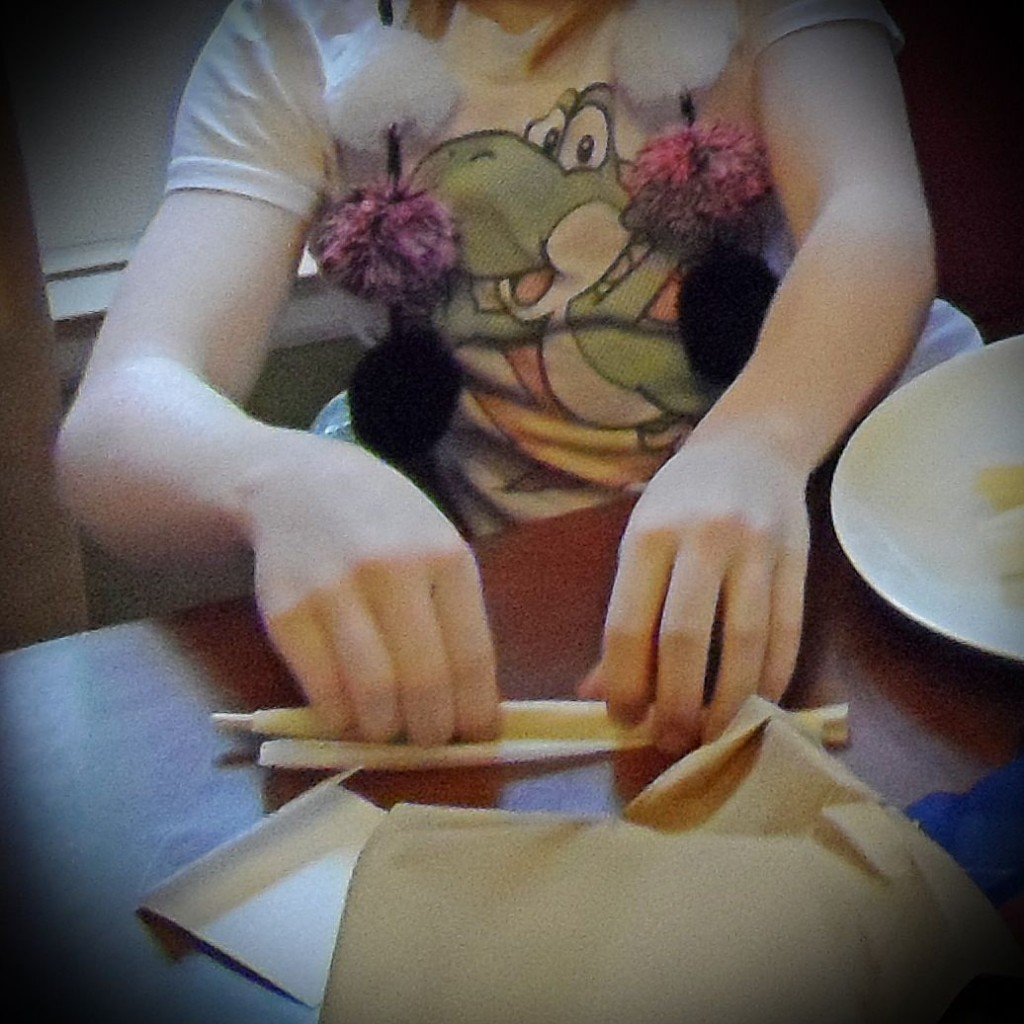
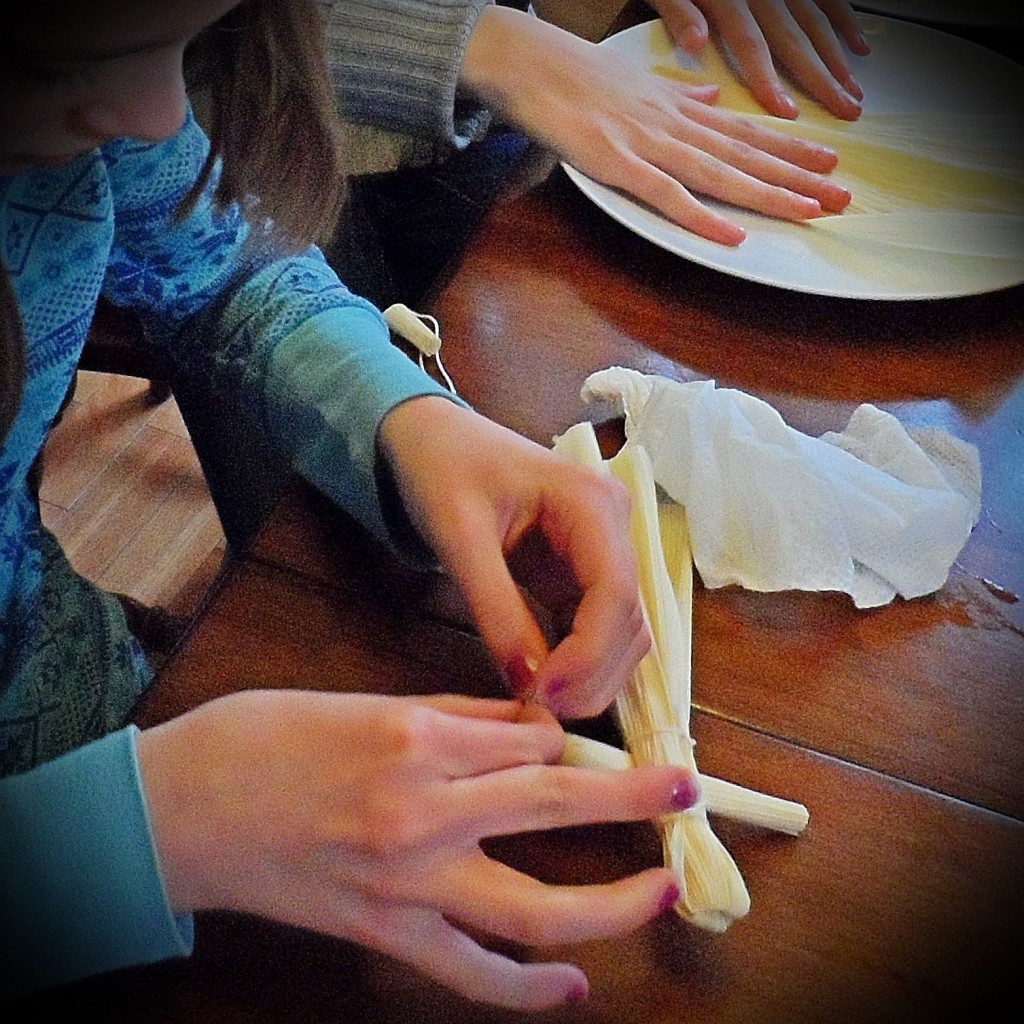
We used these fairly simple step-by-step illustrated directions from MarthaStewart.com. The girls needed some help with the first two steps, which involved binding the ends of one stack of four to six dampened corn husks and then splitting that stack down the middle, folding the even halves over the little “nob” they’d just created by binding the ends, and then binding the new chubby end into a “head” shape. Here’s how it should look after that step:

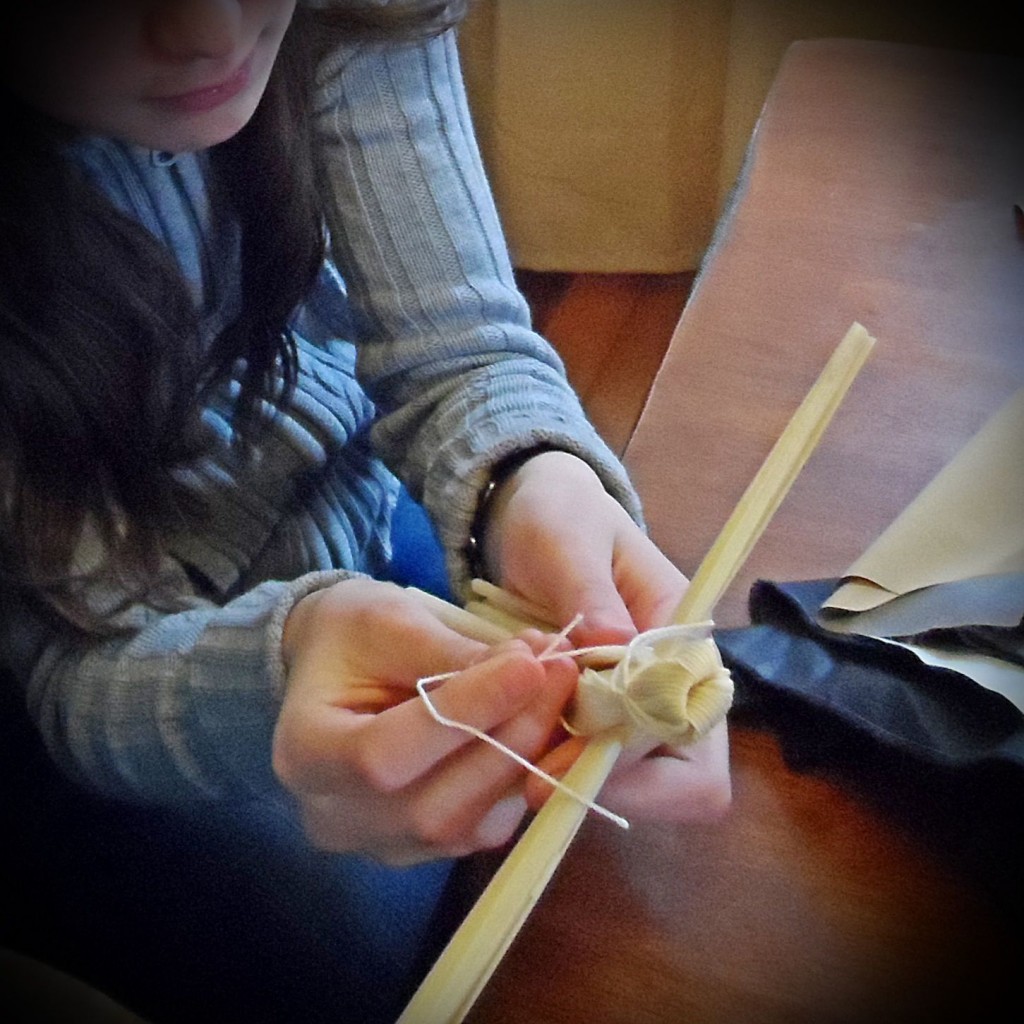
The easiest step was taking one dampened corn husk sheet and rolling it, then tying off the ends to create the arms.
The arm “stick” is then placed evenly between the husk sheets dangling below the head, and another tie below them creates the doll’s waist.
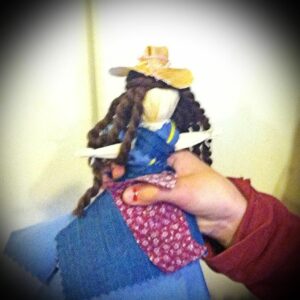
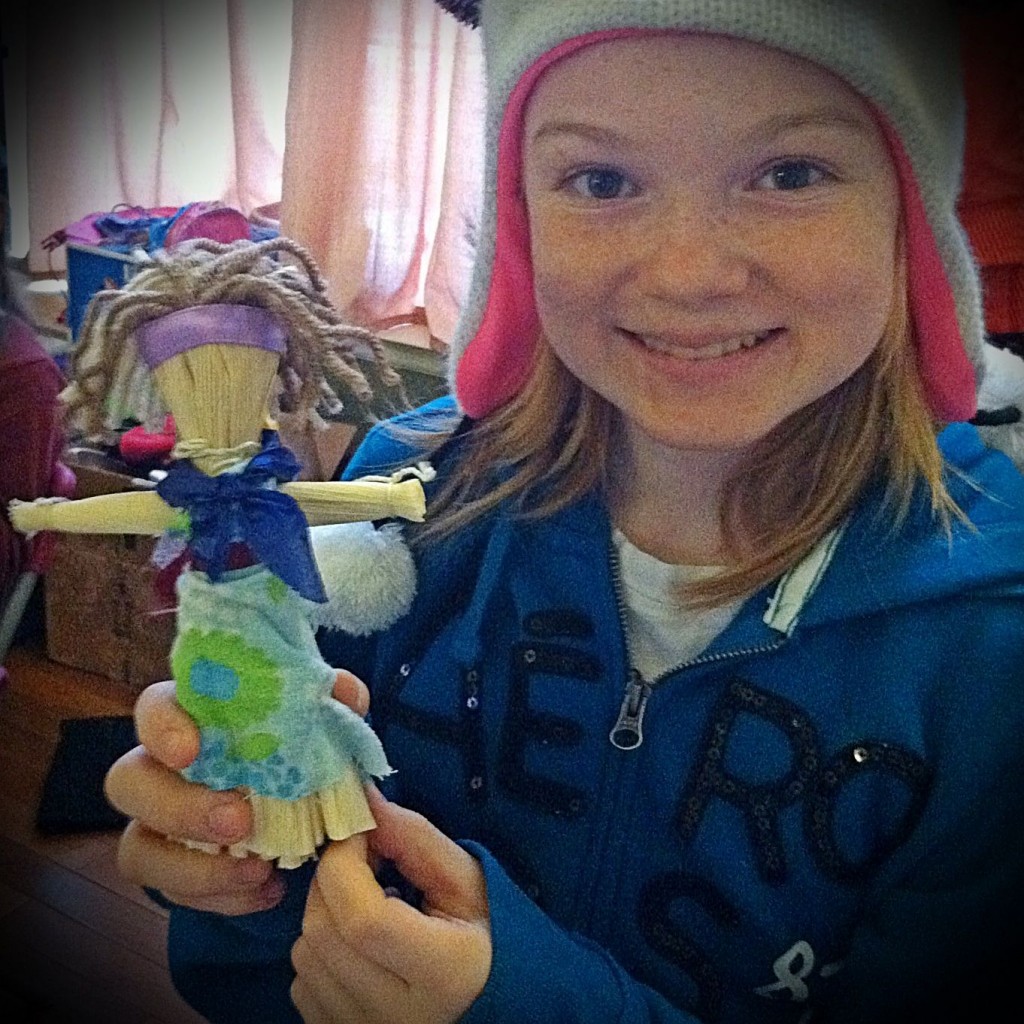
At this point, you have a head, arms, a waist, and a dangling skirt of corn husks. Now you can trim off the ends of the arms for hands, and you have a basic girl doll body.
Now you can get creative! You can keep the dangling husks loose and fluff them out like a skirt. Or you can separate the dangling husks into two equal parts and and bind out two separate legs for a boy.
Most of the girls decided to make girls, of course:
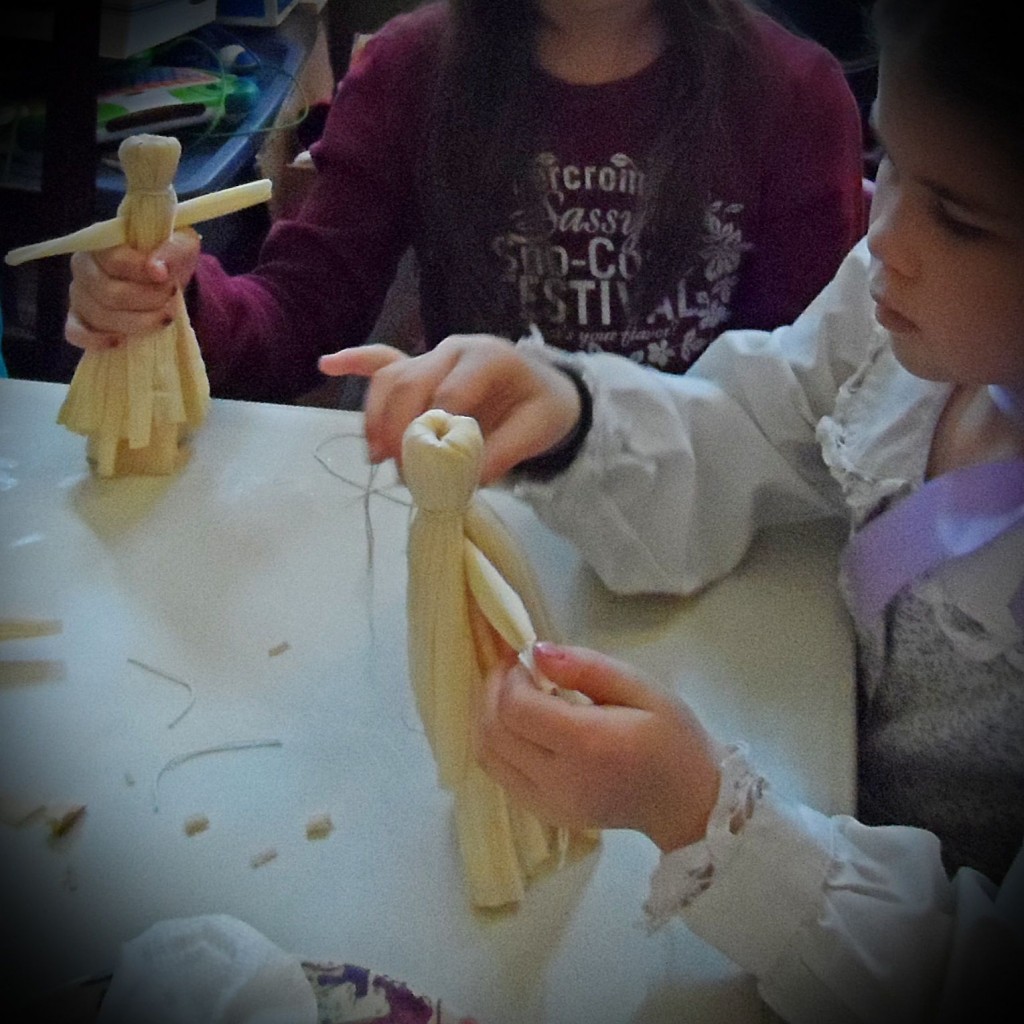

We gathered scraps of fabric from various free sources, as well as ribbon and yarn, so that the girls could create outfits and hair for their dolls. There were no specific instructions on how to create the doll’s hair on the Martha Stewart guide we were using: It simply said, “To make hair, glue yarn or raffia to the heads.” It was a bit of a challenge, but after some trial and error, most of the girls got plenty of yarn hair on their dolls. Very adhesive glue helps on this one!
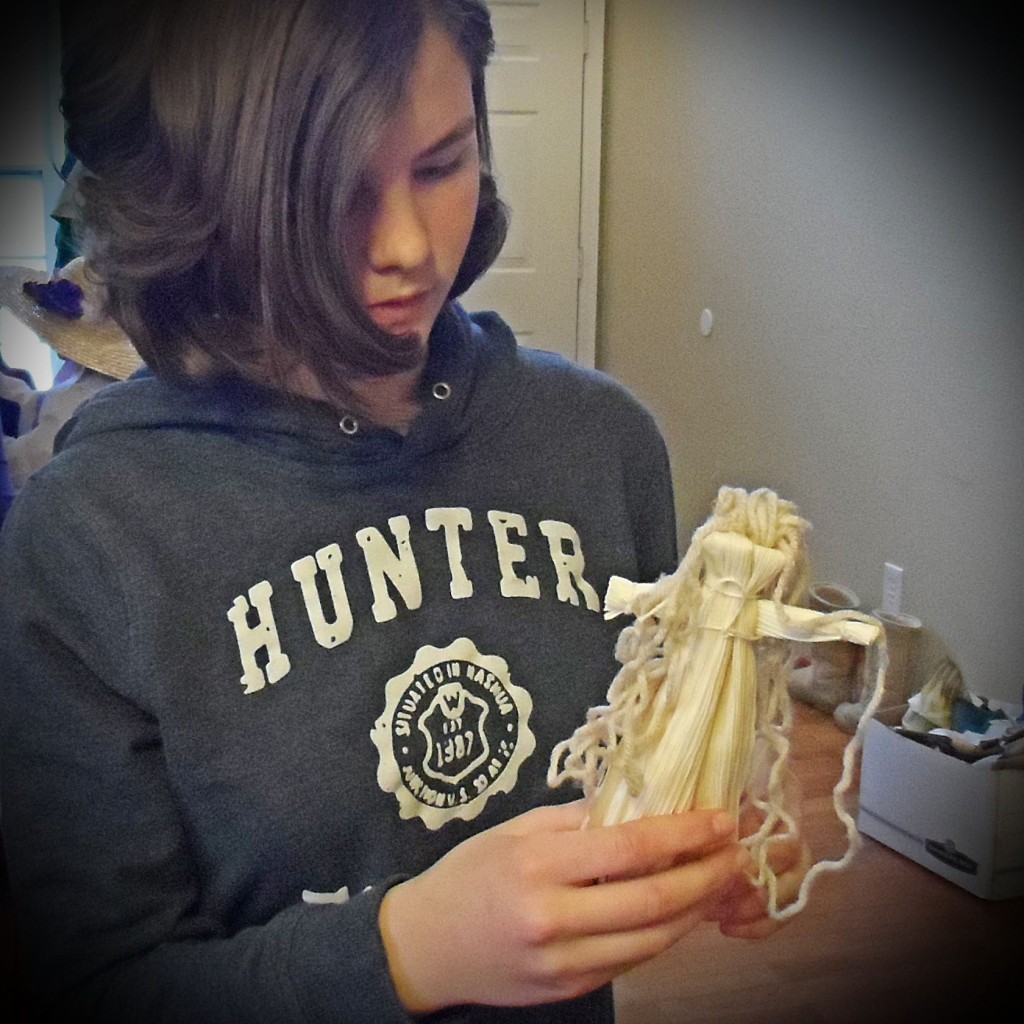
Then came the dress designing! This was definitely the most exciting part of the doll creation process. What little girl doesn’t enjoy designing an outfit when they have a stack of colorful fabrics and ribbons in front of them? I have to say I was really impressed with the results.
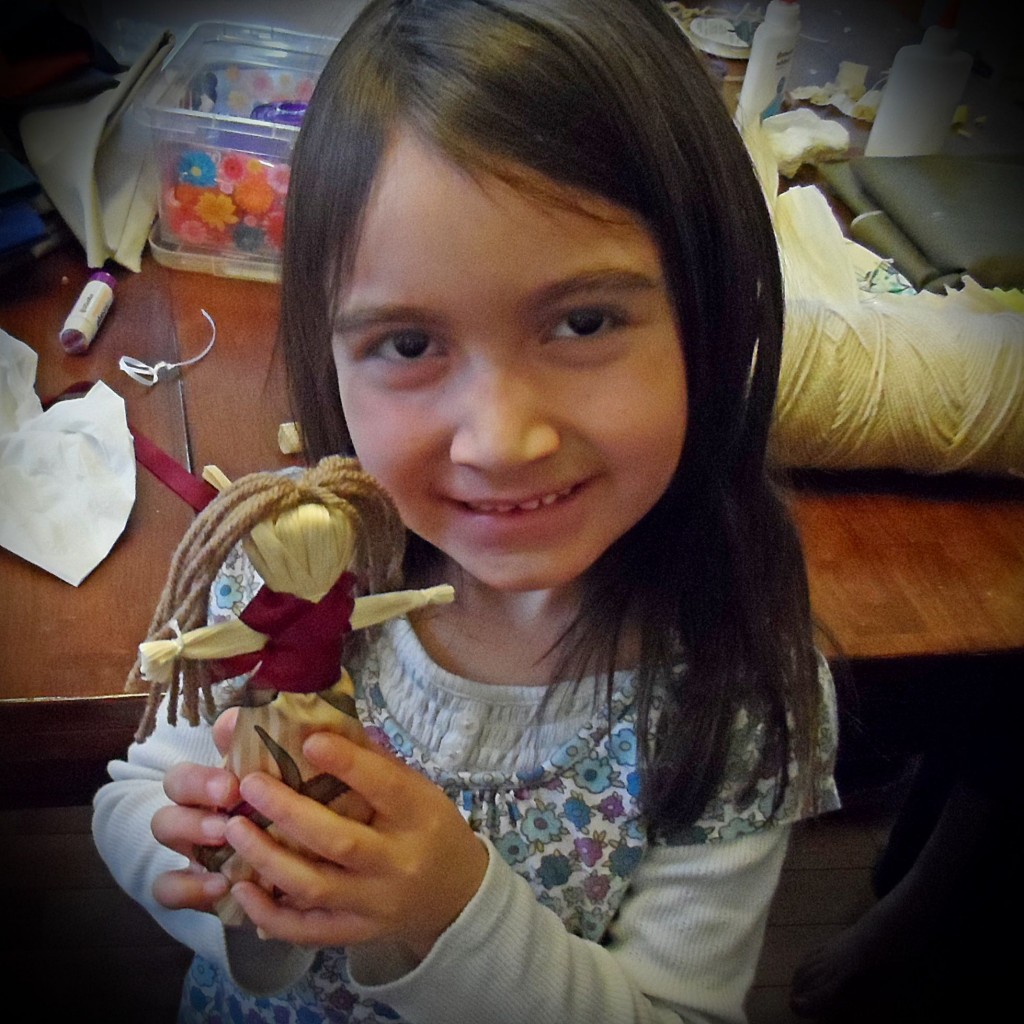
In the end, I was very pleased with our first “Little House” craft project, even if it didn’t turn out to be specific to the book. I had no idea that the girls would have so much fun creating their dolls. Plus, once the girls were done with their dolls, they immediately struck up role-playing with them.
So if you find yourself studying Native American culture or early American history, creating corn husk dolls is a wonderful hands-on homeschooling experience — even for boys. Can’t you imagine a little frontiersman expedition taking place with a troop of corn husk boys decked out in corn husk weapons?
The project is simple enough that you don’t have to be super crafty or purchase specialized supplies to pull it off. The dried corn husk packs (easily purchased in the Mexican foods section of your grocery store) were the only items we didn’t have on hand already. We gathered up a nice variety of fabrics and extras from all the moms who brought scraps from various sources. And I already had glue, scissors and yarn on hand. My only recommendation for an improvement on our experience would be using better glue, maybe a hot glue gun?
I would love to know if you’ve ever made corn husk dolls, and if so, do you have any tips or suggestions for us? Share them in the comments section below. I know my girls want to do this project again, so I’d love to hear your experiences and any improvements you might have!
*This post may contain affiliate links. Please see our full disclosure policy for more information.
We have a couple of corn husk doll kits, but just haven’t made them yet! I loved the dolls. The girls did a wonderful job on them! Thanks for linking up!
Thanks for the link-up opportunity, Joy! The corn husk dolls turned out to be so much fun. I was really proud of the girls and how creative they were. I had no idea it would be such a big hit, even with the moms!
Renée
Those dolls are absolutely adorable 🙂
Thanks Renee, I agree — I was really impressed at how well all the girls decked out their dolls. It was so much fun!
What a fun project to do with your daughter(s). This post will be pinned and book marked for me to come back to when S is a bit older and she and I can create them together. Thank you for sharing and for linking up to Inspired Wednesdays.
So fun!
My kids were homeschooled till college and while we were in that season of life I often thought the proof of success would be if they chose to homeschool their kids… I’m thrilled to see you and your friends homeschooling! (my kids plan on homeschooling but they don’t have kids yet!)
Thank you for sharing! My sis-in-law Rosanna (who writes here too) has two nextgen homeschool graduate daughters that plan to homeschool too in the future. It’s awesome to see this legacy being passed down to the next generation. Blessings to you & your family!
I LOVE this tutorial! I am going to add it to my Pinterest page. Thank you for sharing it at Tending the Home Tuesdays at Road to 31. I will be featuring it in my Weekly Wrap Up tomorrow as it was one of my favorites! I am a new follower and look forward to reading more!
Thank you for featuring us, Lindsey! It was really one of the most fun yet simple projects we have done with our book club this year. I hope your family enjoys it when you give it a try. We invite you to link up with us as well, our “what’s working Wednesday” linkup is still open!
So neat! Thanks for linking up at Family Fun Friday.
Best Wishes,
Monica
https://happyandblessedhome.com
What a cute idea! I want to implement this in our group too! Thanks for linking up with my Homemaking Linkup. Have a lovely day!
Blessings,
Mrs. Sarah Coller
Me again—I’d like to feature this article in this week’s linkup post but I don’t see where you’ve added a link back to my party. If you’d like to add that to your post, I’d love to feature you. 🙂
Hi Sarah, I usually post my linkups in the sidebar – if I didn’t add yours I will, sorry about that. Thank you for featuring this post!
Renee
So cute!! It looks like they had a ton of fun and they did a GREAT job on those dolls.
Thanks for linking up to the Hearts for Home Blog Hop. Blessings!!
Just a reminder that I featured this post today and you’re welcome to grab a “featured” button from my sidebar. Have a great night!
Great idea! We are leaning towards using the Prairie Primer as our main curriculum in another year, and this would be a great project to have on hand!
Thanks for linking up to the Bee Crafty Kids link up!
Thanks! Our homeschool group is reading the American Girl series and we will be making these tomorrow 🙂
So glad to hear that – my girls love the American Girls series too! These are so much fun to make and the girls loved playing with them long after we made them.
Renée
How fun!!